

Windows Server
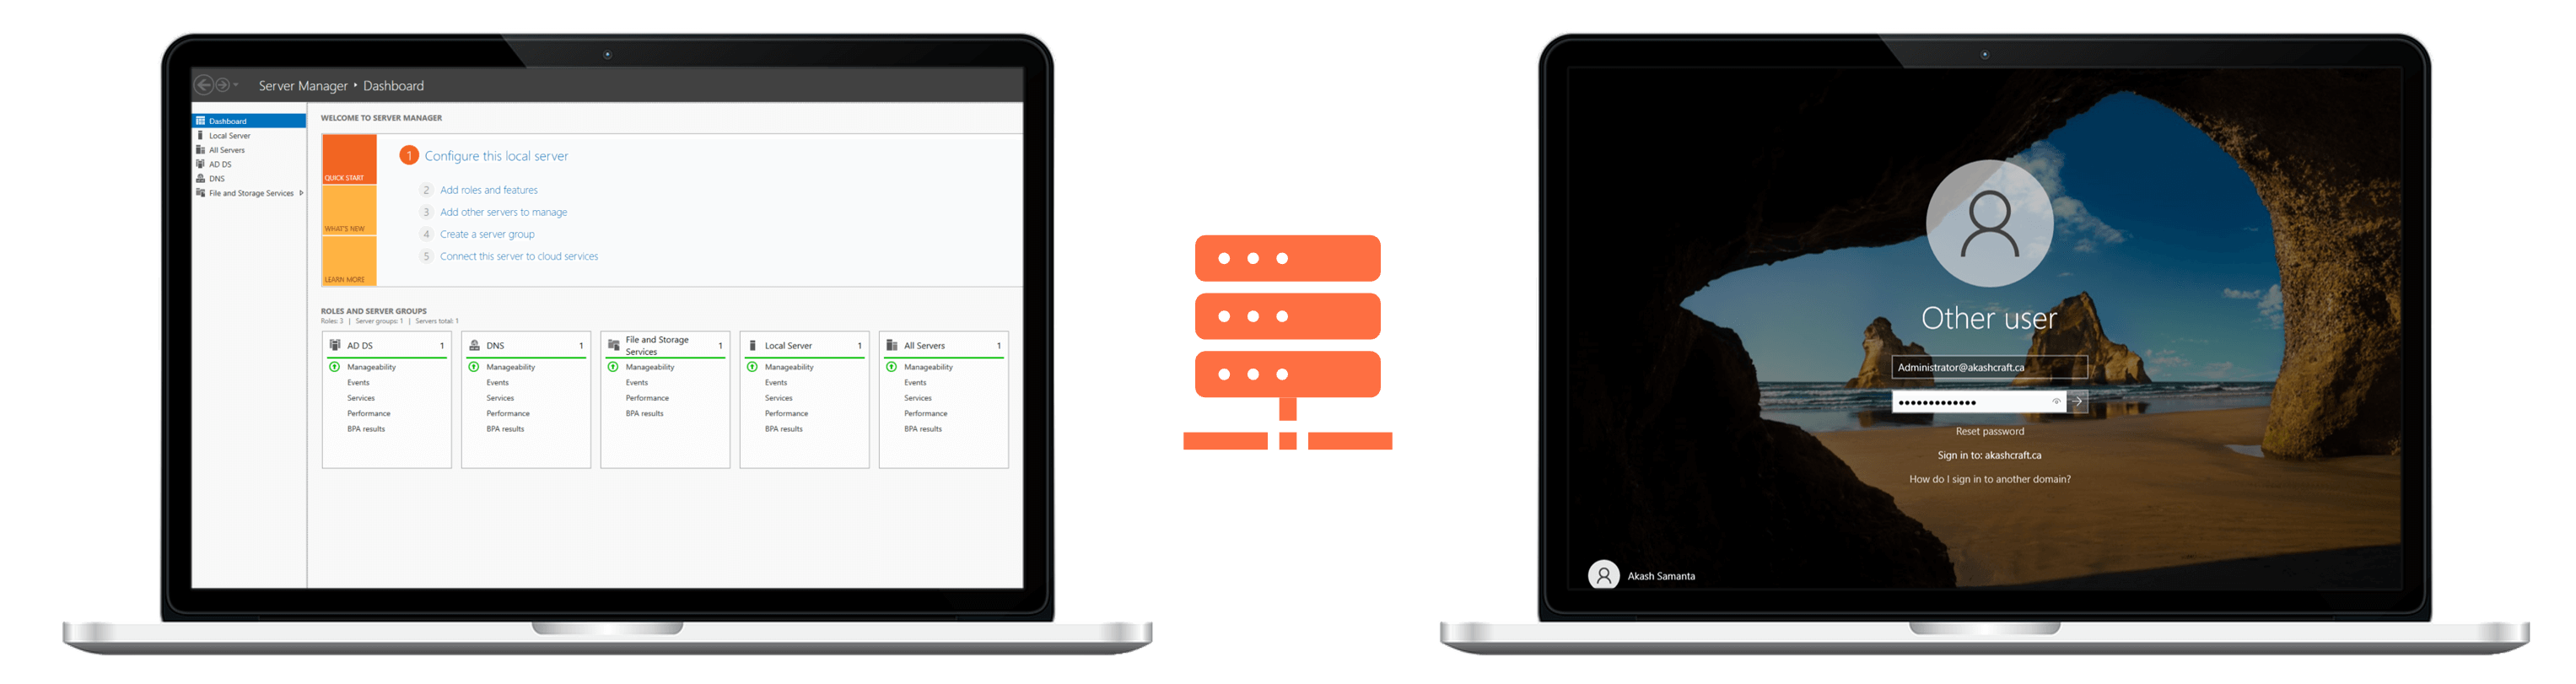
Have you ever wondered how the "Other user" Login Page shows up at your school or work? What is happening behind the scenes? I am glad you asked. This is called the ADDS or Active Domain Directory Service.
While there are different types of servers that can support ADDS, Windows Server is by far the widely chosen solution. It offers a robust group policy management and user credential validation unlike any other. I built an ADDS and DNS (Domain Name System) server back home as a fun project. This webpage is not a detailed guide but can point you in the right direction.
We will be using Windows Server 2022. You can get an evaluation copy for 180 days from Microsoft. Install the operating system and set up the server. To get started, add the ADDS and DNS server roles by following this guide.

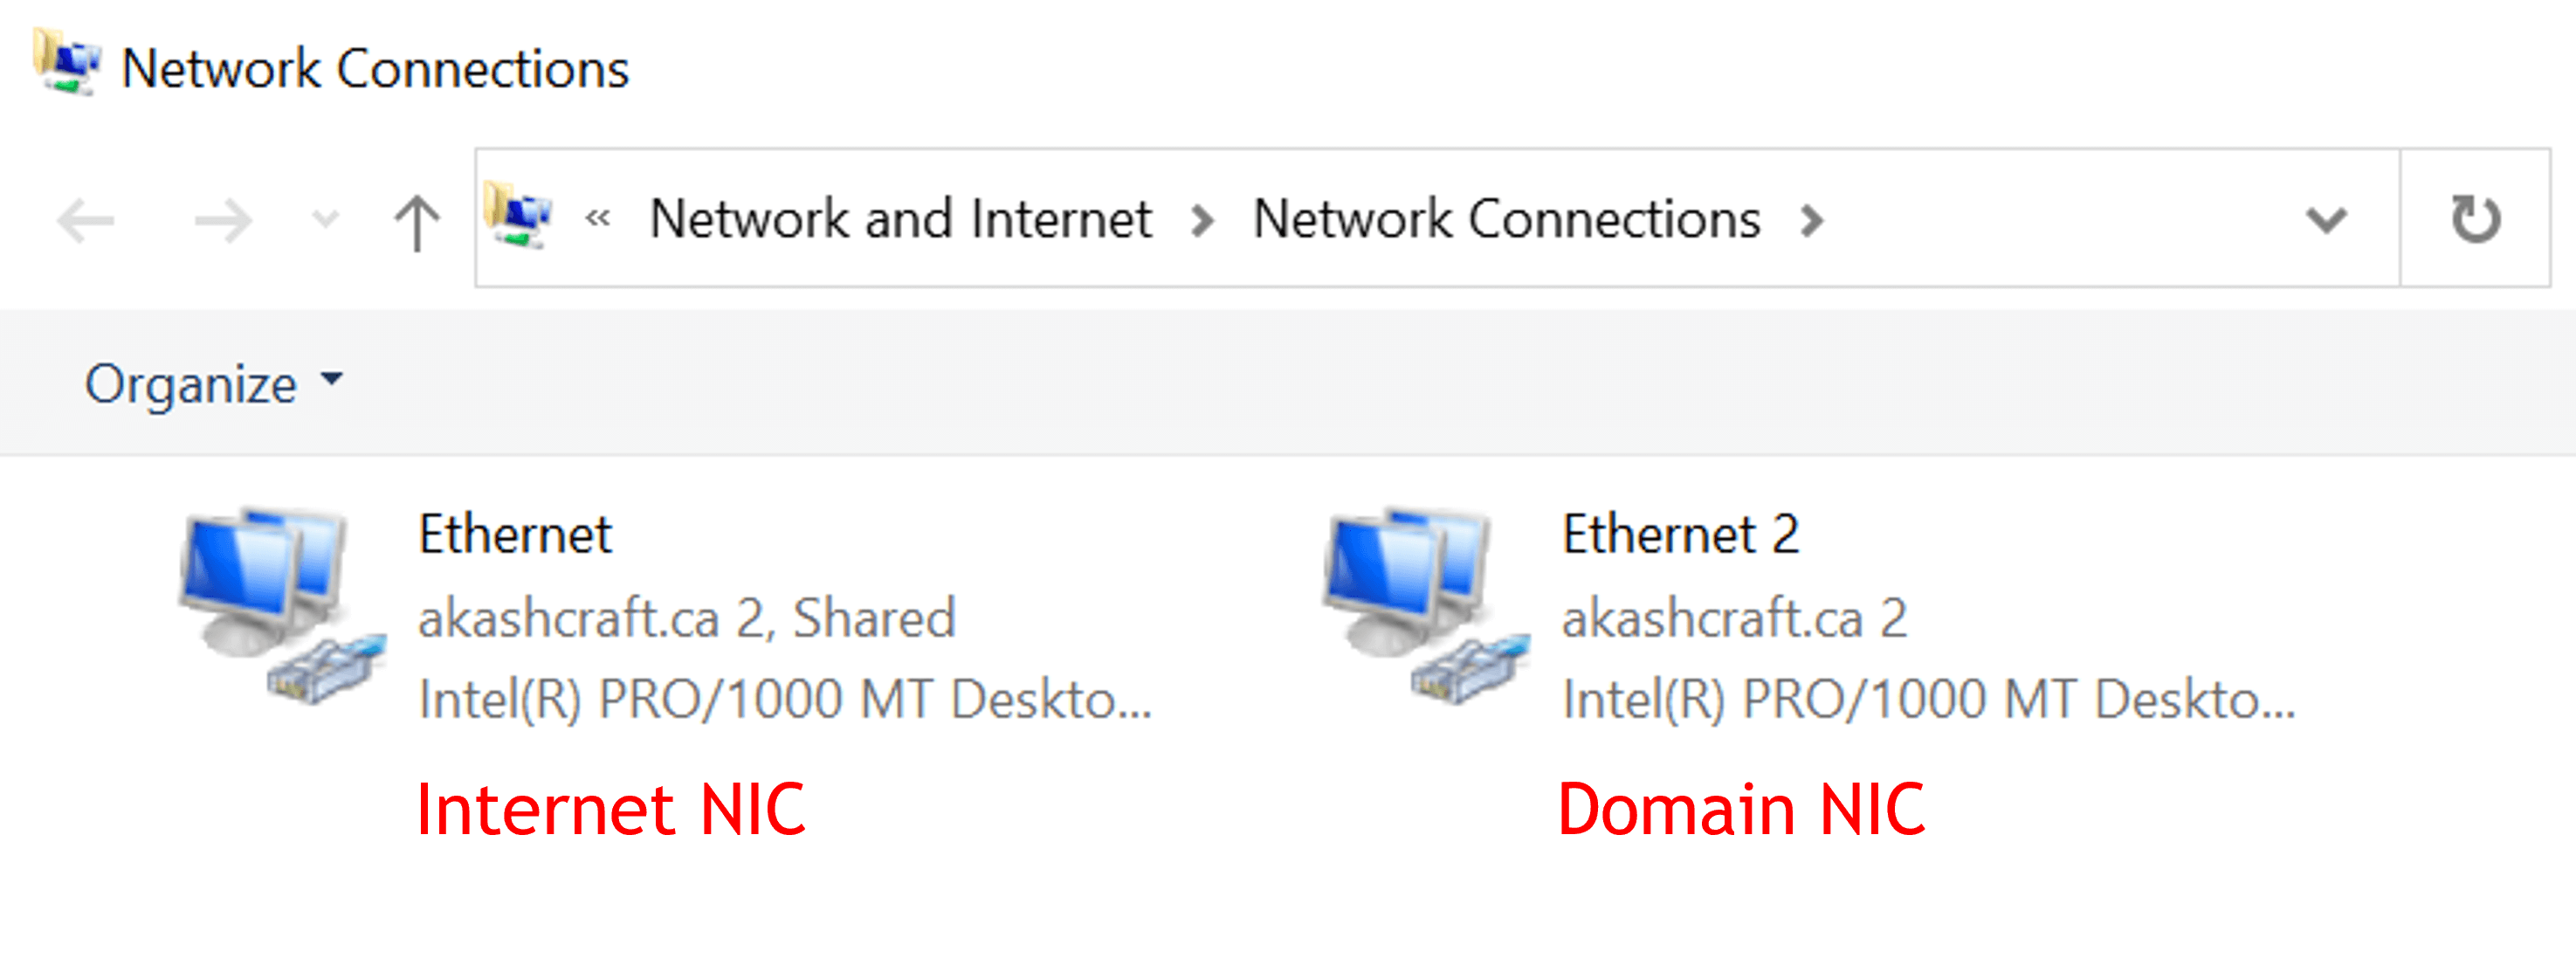
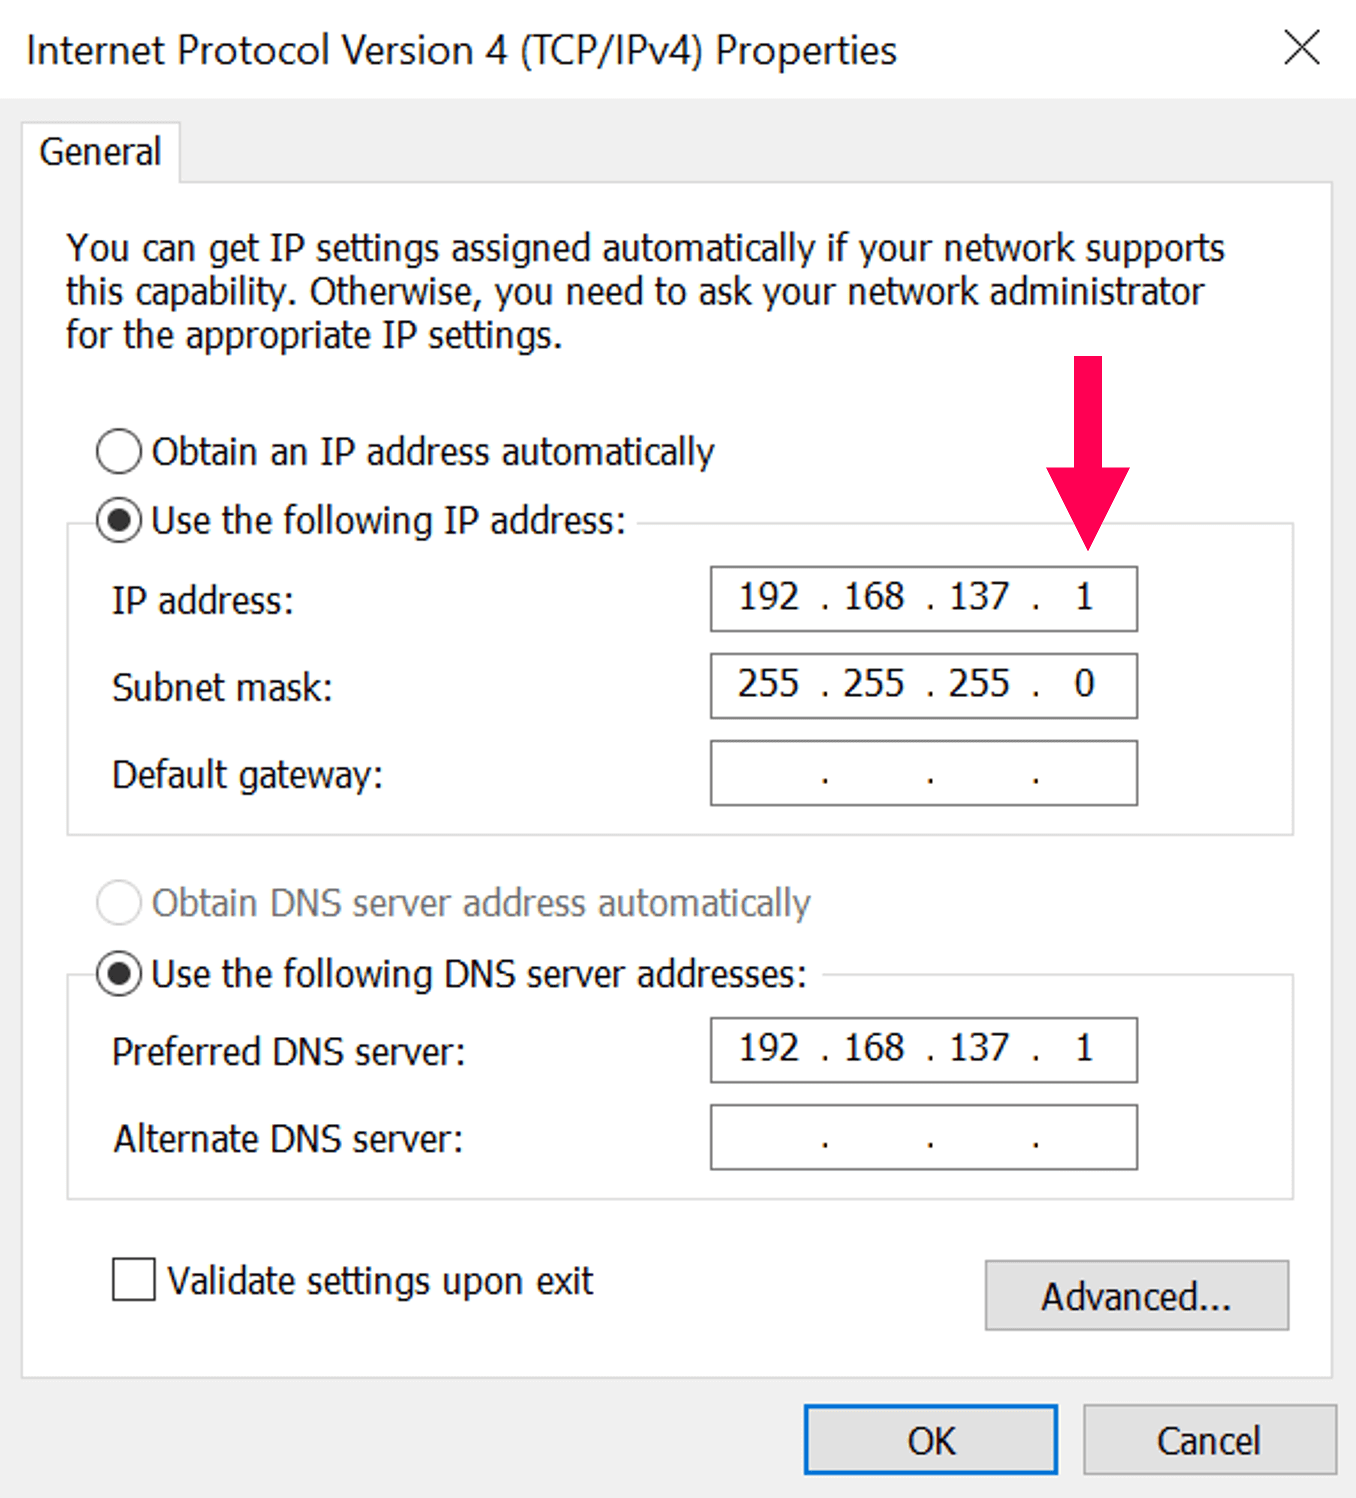
More importantly, set a Static IP for your Windows Server. You will be using this address a lot! So make sure to reserve it on your router as well, if you plan to connect your server to your home network. Run ncpa.cpl and navigate to the IPV4 properties of your network adaptor. A server should typically have multiple NICs (Network Interface Cards) and lots of storage. You may also use ICS (Internet Connection Sharing) from the Server.
Windows Clients
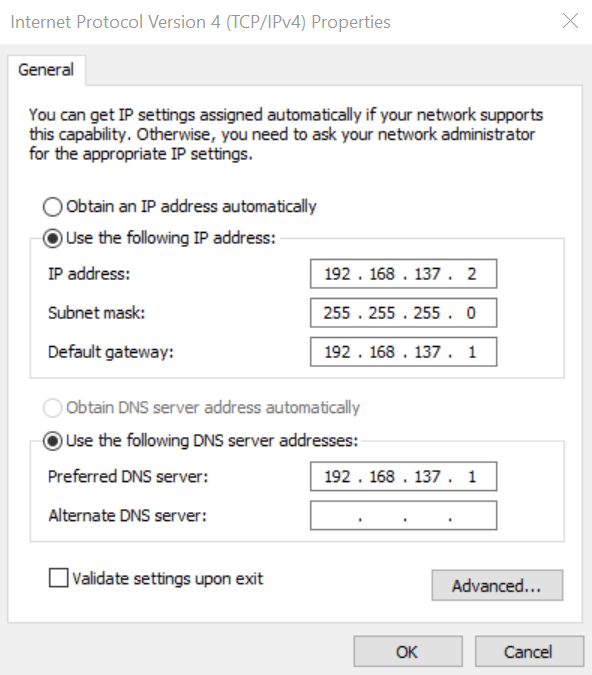
Run ncpa.cpl and navigate to the IPV4 properties of your Client PCs network adaptor. Point to the Windows Server IP Address (in this case, 192.168.137.1) under the DNS Settings. Set Static IPs for Clients if no DHCP (Dynamic Host Configuration Protocol) Server is present in the network.
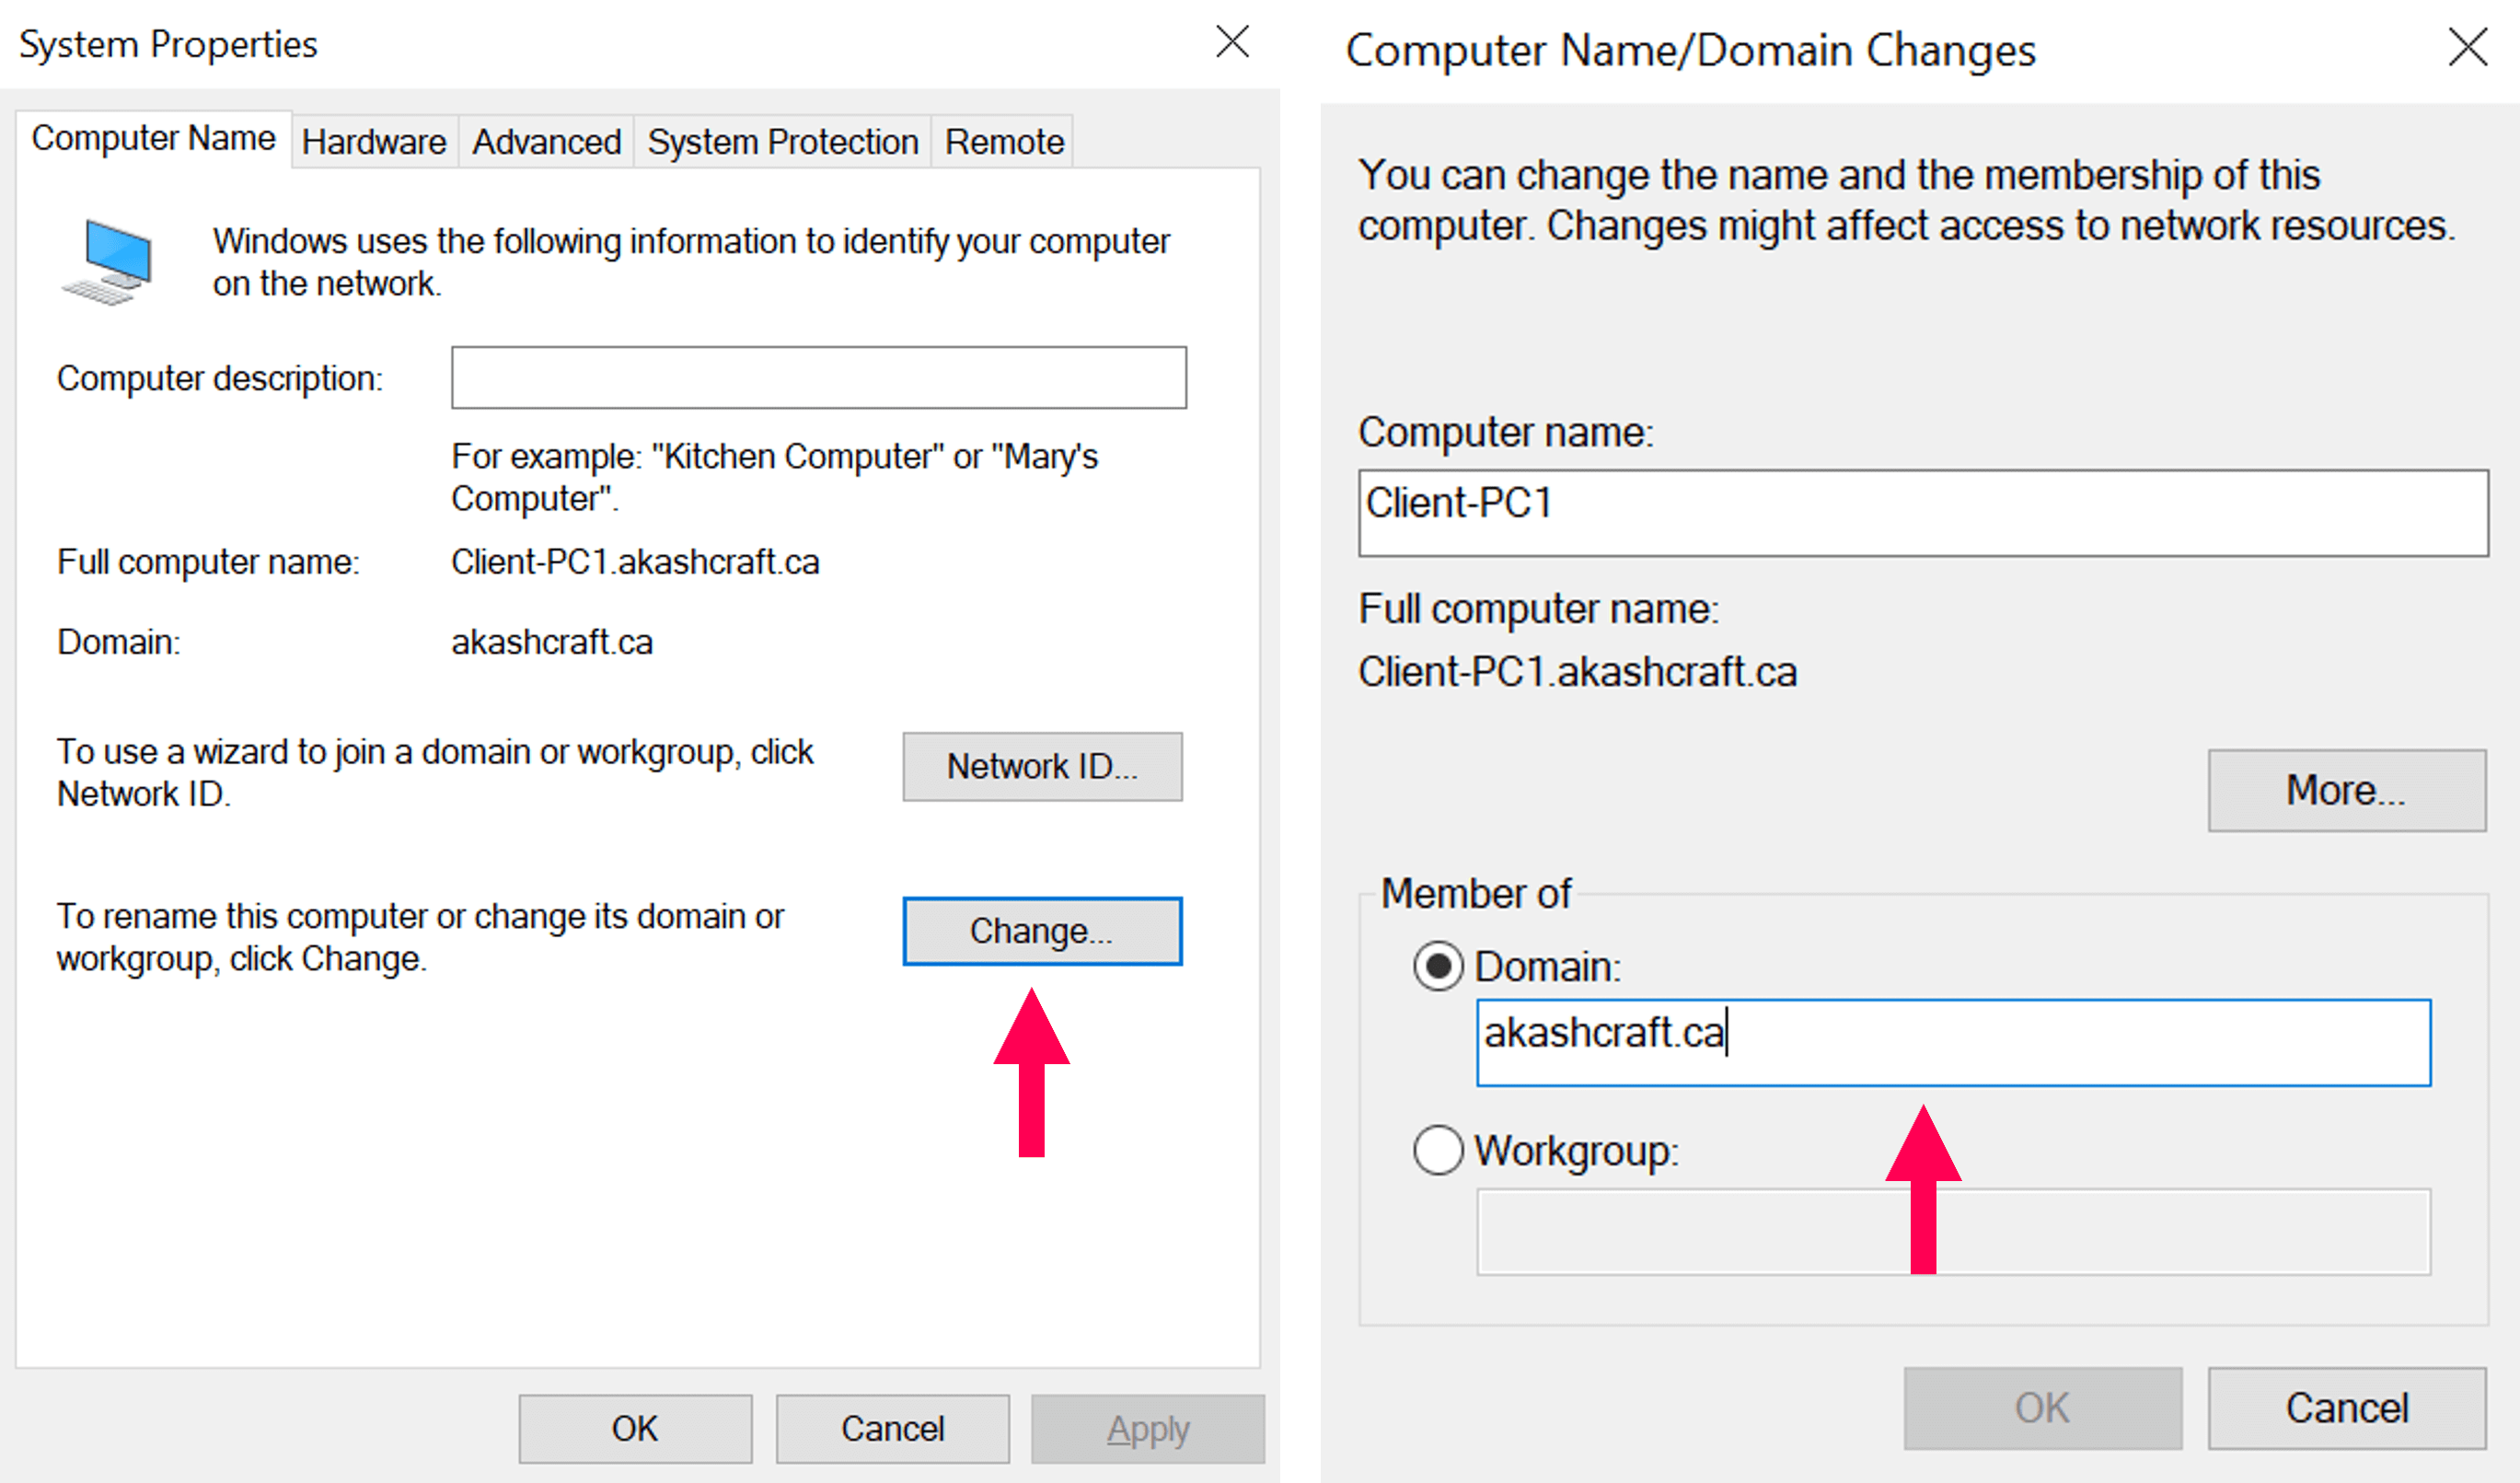
Finally, run sysdm.cpl in your Client PCs. Change your Domain to your ADDS Domain you have set earlier. Enter your Server Administrator Password. Restart your Client and you should see the ADDS working.
We have just created the following network. You can take a step further and utilize the true benefits of this setup by setting up Roaming Profiles and File Sharing. Roaming Users can "roam" and access their synced files from any device on the domain network. This also provides backup in case of hardware failure or malware attack.
Enterprise Wi-Fi
Now that you have your awesome network setup, time to go further. You see with ADDS, you can take advantage of user credential validation using NPAS (Network Policy and Access Service) Role. This way you can use your Windows Server as a RADIUS (Remote Authentication Dial-In User Service) Server.
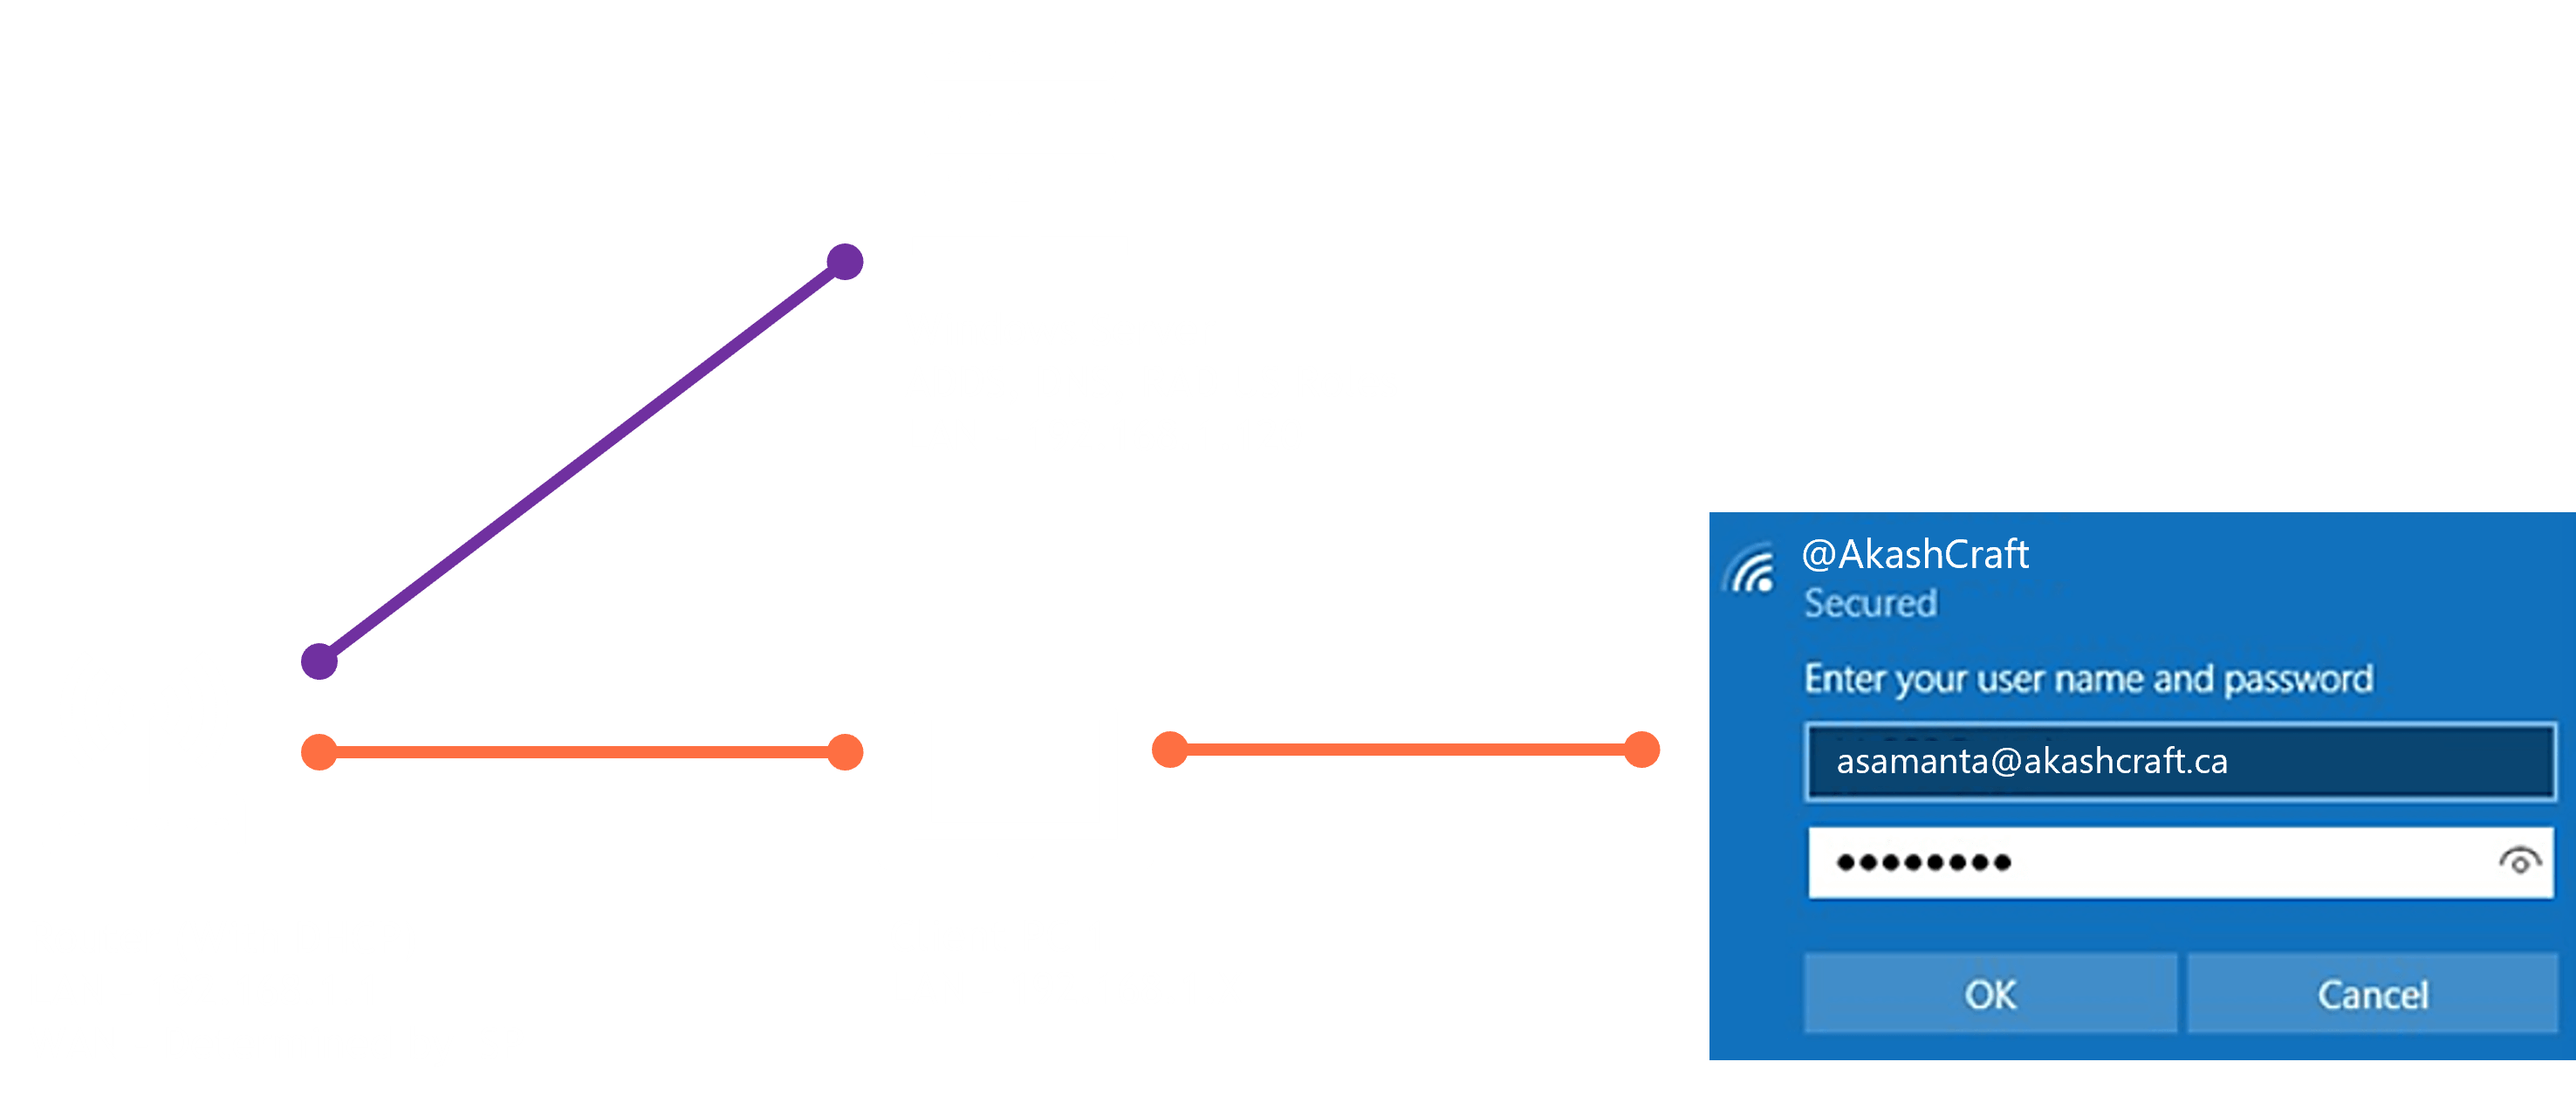
This is the foundation for those Enterprise Wi-Fi you see at businesses and corporations. You can see this guide on how to add this role to your Windows Server. Create a Pre-Shared Key. Once that is done, do not forget to add ADCS (Active Directory Certificate Services) Role to your server for Certificate Validation on Clients.
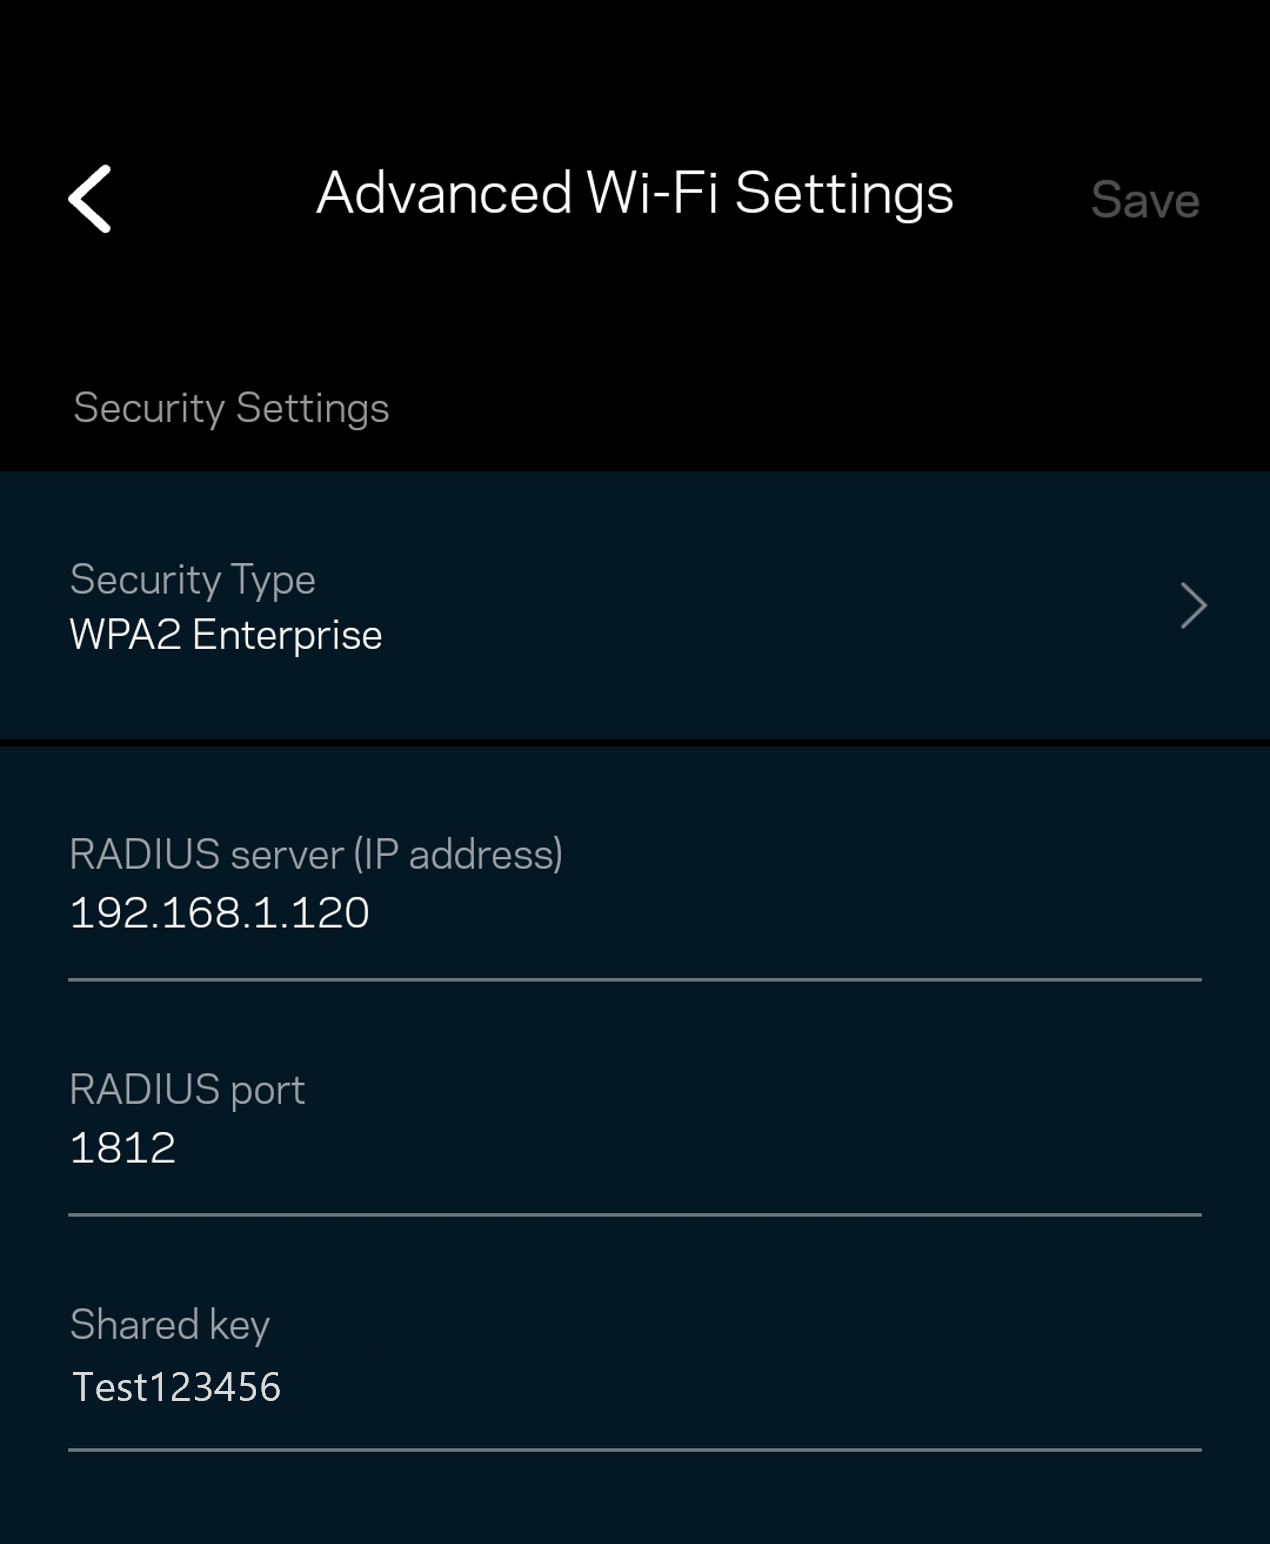
Finally, open your Router Management Page and choose WPA2/Enterprise as your authentication type. Now your router is a RADIUS Client. Point all addresses and ports to your Windows Server Static IP we set earlier (My Home RADIUS Server was at 192.168.1.120 in this example). Reboot the router and enjoy your Enterprise Network!
Guest Wi-Fi
We save the best for the last. You most likely have seen Open Guest Wi-Fi(s) at public places such as a coffee shop, hotel, or airport with the "Sign in to Network" prompt showing up in your device. This is a form of authoritive DNS which usually involves expensive routers and authentication servers but you can do it under $100 bucks!
A router first checks if the user is authenticated, if not, they are redirected to the Captive Portal Login Page. This redirection triggers the CPD (Captive Portal Detection) Protocol on the connecting device which asks users to "Sign in to Network". Pre-authenticated users are only allowed in the Walled Garden and the Login Page. Credentials are often checked by a FAS (Forward Authentication Service) Server. Some cases, this is skipped (like Click to Connect). Authenticated Users are leased an IP and are let through the firewall. All traffic including connectivity check websites are then allowed.
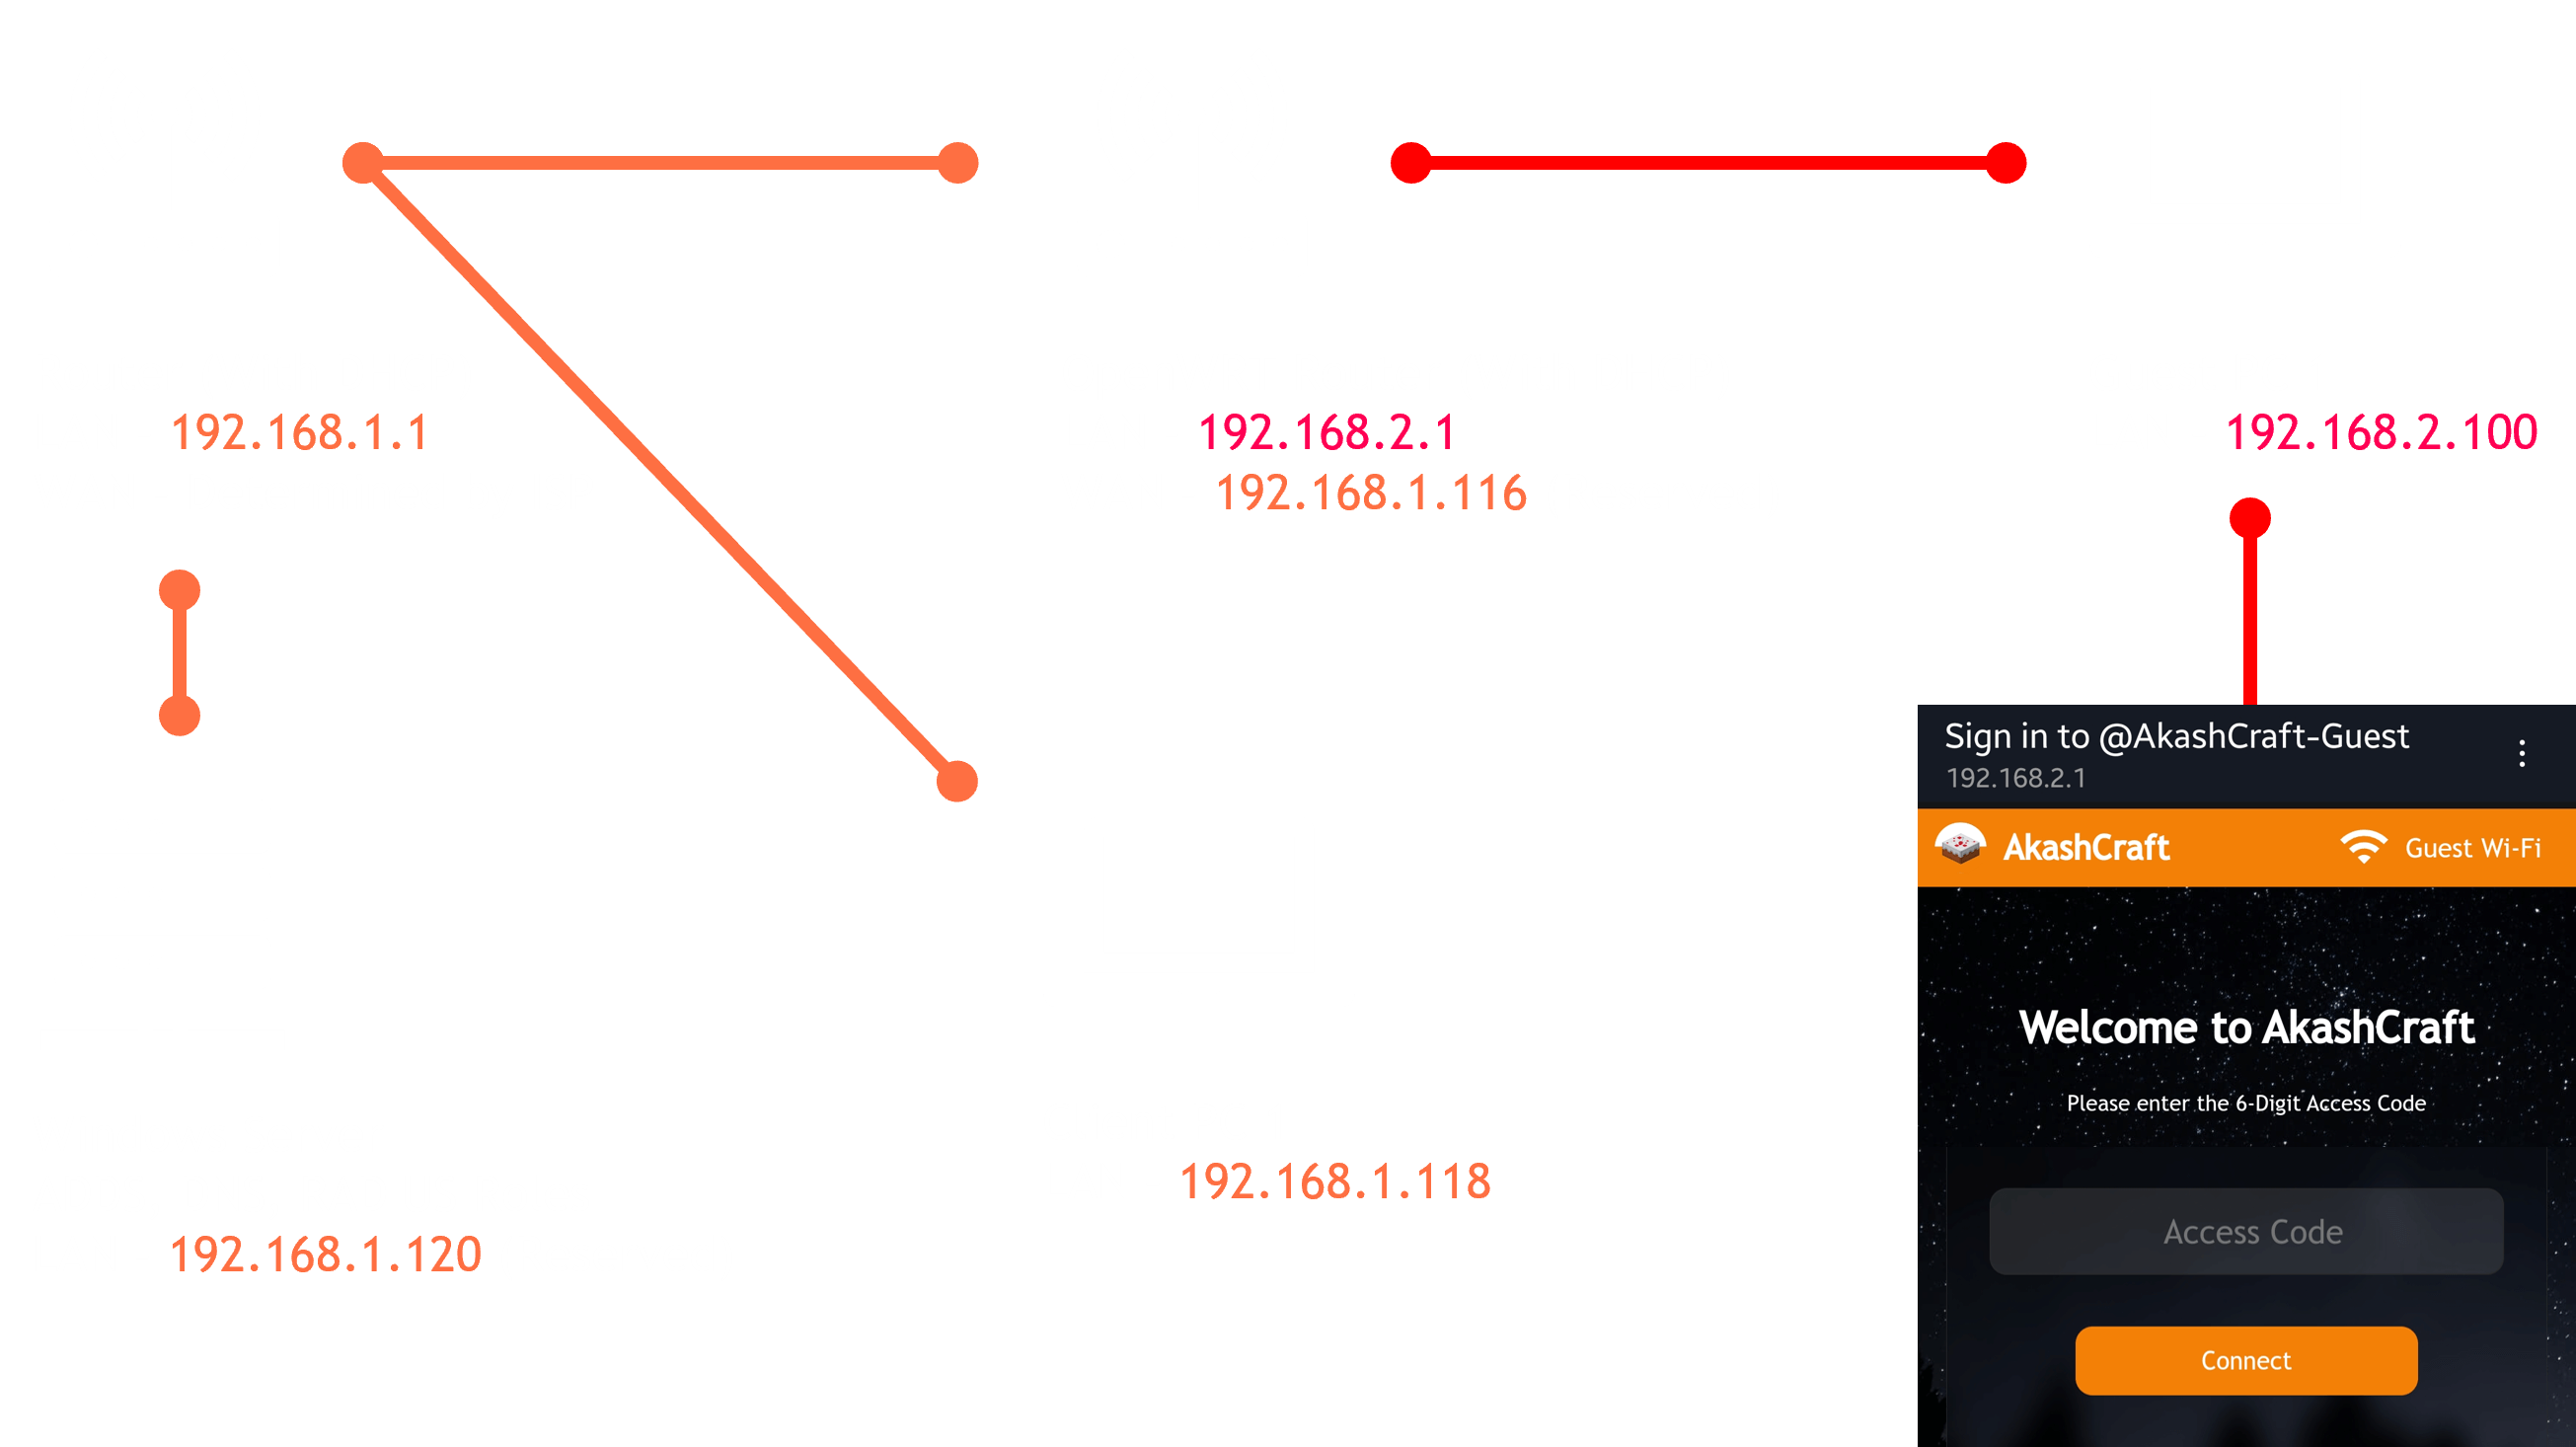
You can setup your Guest Wi-Fi by following the OpenWRT documentation for initial setup and then using the OpenNDS package for the Captive Portal Page and Firewall Policy. It is robust and also provides a list of supported routers.
I recommend buying a separate inexpensive router which has sufficient ROM Flash, Memory and CPU. Yes! Routers are computers too. This way you stay clear from your main router and experiment as much as you want. You will be voiding your router manufacturer's warranty as this involves replacing the router's OS.
I bought the TP-Link Archer C20 router. It fits my project requirements perfectly! You may view and use some of the OpenWRT files I used for this router using the button below.

In my case, the Captive Portal Service, Network Bridging, DHCP Role, FAS Role, as well as Web Hosting Role for displaying the login page (stored locally) are done through that single router which is super cool!